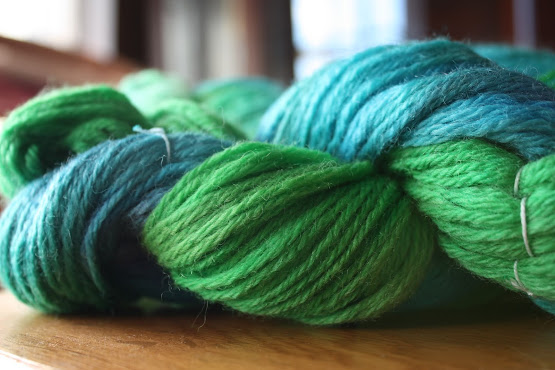
How to Dye Yarn in the Microwave: The Ziploc Bag Method
Supplies:
- Vinegar
- Water
- Glass Pyrex bowl
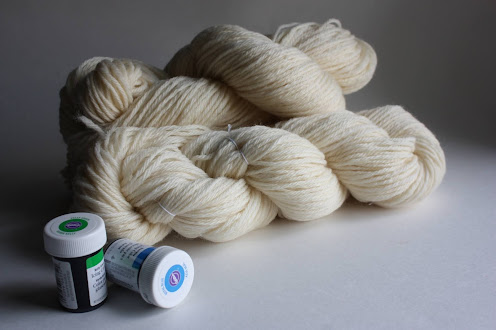
- Wool - Yarn I used Lion Brand's Fisherman's Wool, but any 100% wool can be used. You can also use some wool blends. I have had success with blends with 80% wool. You can also use a super wash wool and not have any worries about felting.
- Wilton Icing Colors – I used Kelly Green and Royal
- 2 Pyrex measuring cups
- Gloves
- Paper towels
- Aluminum foil
- Ziploc heavy duty freezer bag gallon size
Step 1
Prepare your yarn. In order for us to dye the yarn we need to wind your yarn into a hank, or a large ring of yarn. You can do this with a nitty noddy if you have one. If you don't have a nitty then you can use my tutorial on how to tie your yarn into a hank with a chair.
Step 2
Prepare your work space to protect your counter tops. I like to use aluminum foil to cover my work area. I also laid down paper towels. Keep the paper towels close by for a quick clean up. Gather your supplies. Don't forget to wear the glove to protect your hands from staining.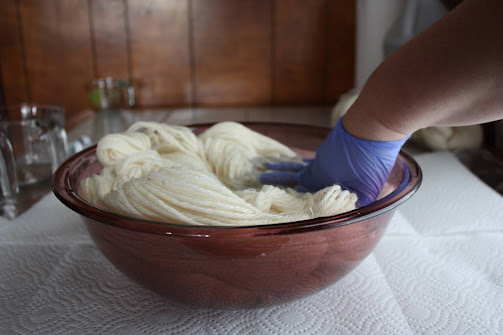
Step 3
Soak your yarn in a water and vinegar solution. For this batch I used a ratio of 1 part vinegar to 6 parts water. Let soak for at least 30 minutes. You can mix your dye while your yarn is soaking.
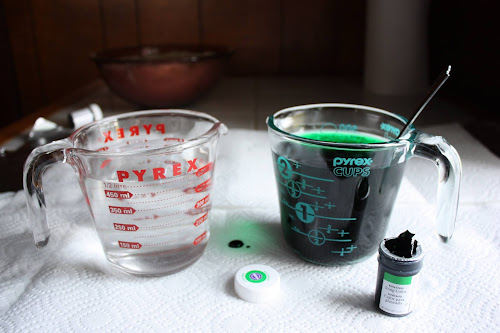
Step 4
Mix the dye. Fill Pyrex measuring cup with 2 cups of water and1 tablespoon of vinegar. Dip a fork inside of the icing color of your choice. Stir into the measuring cup. You can also add some food coloring if you like. I decided to mix two dye colors for this batch. I used two forks full of Royal for one of the measuring cups, and 2 forks full of Kelly Green for the other measuring cup.
Step 5
Microwave your dye for 2 minutes. Stir again to break up any chunks of icing color that still need to dissolve. Set aside for at least 40 minutes.
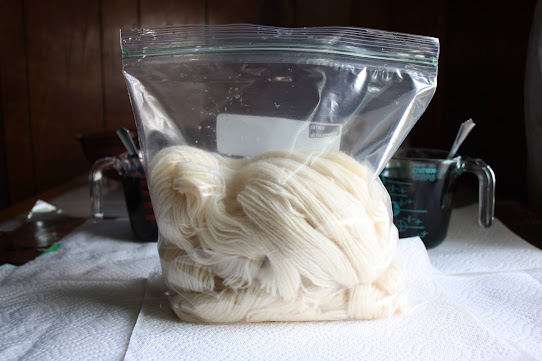
Step 6
Transfer your yarn into a Ziploc bag. Gently squeeze out the excess water, but do not wring it out.

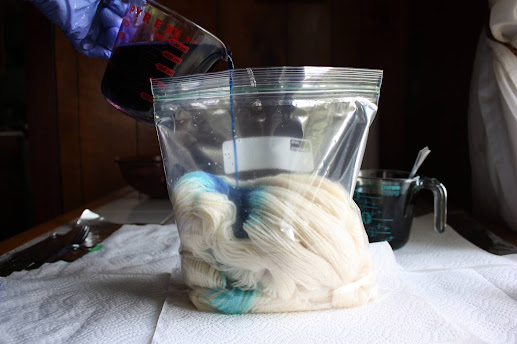
Step 7
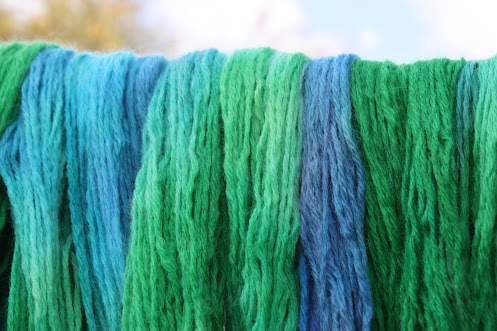
Pour dye into the Ziploc bag a little at a time. I poured the blue on the left side and the green on the right side. You can use a spoon or your gloved hand to make sure the dye reaches the inside of the hank. I ended up using all of the dye.
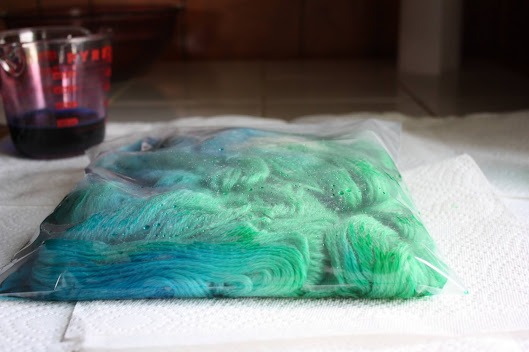
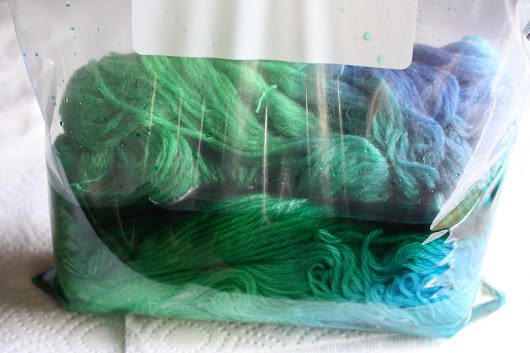
Step 8
Place the bag in the microwave, and microwave for two minutes, then let it rest for two minutes, and then microwave for two minutes. Repeat microwaving and resting at two minute intervals until the water in the bag is clear. I had clear water in four cycles.
Step 9
Wash your yarn in the hottest water that will come out of your faucet. Use a few drops of dawn dish detergent, gently swish yarn, and rinse well. Be careful not to let the water flow directly onto the yarn. Too much agitation and dramatic temperature changes can cause your yarn to felt. Hang the yarn to dry.
 How to Dye Yarn in the Microwave: Ziploc Bag Method[/caption]
Thank you! This actually looks awesome (and I do know where to get Wilton's Icing colours!) I may have to try this!
ReplyDeleteThank you! It's so much fun! I hope you enjoy it!
ReplyDeleteSay what?! This is so cool, and great to know, as I have many icing colors.
ReplyDeleteI love this idea! I love to crochet and would love to try to dye too!
ReplyDeleteI have a lot of dye and look forward to doing this with my toddler.
ReplyDeleteThis is amazing! I had no idea that you could using wilton dyes on yarn nor that there was a microwave method! This is so cool!
ReplyDeleteStep 9 - do you wash the yarn in the sink or do you need a stainless steel sink so the dye will not color the sink. And do you squeeze out the remaining water before hanging to dry? Thanks so much. I will definitely try this.
ReplyDeleteI have an ancient porcelain sink. I usually rinse food coloring, Wilton Icing colors, and Kool Aid dyes in that sink. After dyeing I usually clean the sink right away. Sometimes if it looks like some of the color is sticking I use a little bleach. I usually do gently press some of the water out before hanging. This should be done gently, and do not ring or squeeze too much. If you are worried about felting, try a super wash wool. Super wash wool takes color beautifully!
ReplyDeleteCan this method be used on other natural fibers, like cotton?
ReplyDeleteUnfortunately, it will not work on cotton. Cotton is a plant based fiber, and this method only works on animal fibers (protein based fibers). I am planning on trying out some of the tie dye kits I've seen at craft stores to see how they work on yarn.
ReplyDeleteThis is the best written tutorial on yarn dyeing I've seen. I'm definitely going to get the Wilton dye and try this. I found you on Pinterest! Thank you.
ReplyDeleteTake a look at Dharma Trading's website, www.dharmatrading.com Fiber reactive dyes for cotton and Acid Dyes for wool and silk. You can mix most colors by combining yellow, turquoise, and fuchsia, so you don't have to spend a lot. They have great directions and much better prices than the craft stores. Just looking at their site gives you inspiration. (No connection, just a happy customer).
ReplyDeleteThank you so much! I would love to hear about your colorways!
ReplyDeleteThank you! I have one of their catalogs! I currently have the Jacquard Acid Dyes, and have been planning a future tutorial using those. The Dharma dyes are on my wish list! I would love to give them a try.
ReplyDelete